Traveling Light to the Himalayas

141015_PER_0001

The small metal clip doubles as a bottle opener.

The small metal clip doubles as a bottle opener.

There are many obvious perks to being a professional photographer. These include traveling, meeting new people, and experiencing incredible, life moments.
But there is another perk that most photographers don’t talk about – the joy of buying shiny new camera equipment along with the camera bags and back packs in which to carry them.

For whatever reason, camera equipment is considered sexier while bags have been relegated to the step-child of a photographer’s tools. However some photographers (including myself) will admit to being a bag addict while others will not come out of the bag closet. In fact, I have a closet in New York that is not only dedicated to bags and packs, but is also bursting at the seams with these wonderful necessities. Anytime I can find an excuse to to acquire a new bag, my day is brightened.

Currently, I am on my way to the Himalayas where I will be trekking through Nepal, Tibet and Bhutan. Traveling light is paramount to my trip. I surveyed my stash of bags and decided to take the Tenba Shootout backpack which worked so well for me while I was in Morocco last month. Rugged with good pockets, it fits my body well and It’s built in rain cover was perfect protection in the desert sandstorms.

Traveling light also means carrying lighter weight cameras. I chose the Sony A7 series, full frame cameras along with a minimal amount of lenses. These included three zooms: 16-35, 24-70 and 70-200. I also included the 55mm f/1.8 lens for low light situations, and a small flash. Everything fit into the Tenba pack and I still had enough room for various accessories and some snacks.

I own bigger packs which hold a lot of equipment but their weight requires a mule to carry them. I can comfortably carry the lighter pack myself and focus on the biggest perk of my profession – having fun taking pictures.

Advertisement

Guerrilla Lighting in Cuba

Portrait of a man on the street in Trinidad, Cuba.
Light, whether natural or artificial is an indispensable tool in achieving great images. To have more control of the look of my images I make a lot of photos with artificial light. I prefer to use big strobes either in large, light boxes or bounced off white flats when I want to achieve a nice, soft feel but if l am going after a “harder” feeling, I’ll use snoots or grid spots that keep my light source narrow and focused. On my recent trip to Cuba, I decided to try something different. I wanted to shoot some street portraits. I hadn’t been to Cuba in over eight years and I was interested to see not only how the country had changed, but also how the people had changed. I would need a smaller and more portable light source to emulate my large lighting scenarios – guerilla lighting in Cuba – very appropriate.

I immediately noticed that the Cubans I encountered were more forthcoming and talkative than those I had met on my last trip. There was no undercurrent of repression. To visually communicate this, I wanted my portraits to be bright and “open”, not dark or shadowy and moody. I was shooting with a Panasonic Lumix GH3 with the FL 360L flash and the 12-35mm f/2.8 zoom lens. Since the camera and flash work wirelessly, I was able to keep the flash off camera and out of the hot shoe. Before leaving for Cuba, I researched many different light modifiers for these small units. I decided on the Lastolite EzyBox Speed-Lite, a mini softbox, that is an 8.6×8.6 inch (22cm) square unit. I liked this unit because I could set it up quickly and it didn’t take up a lot of space when folded. A softbox this small, however can be a source of harsh light unless it is really close to your subject. In order to achieve the soft feeling that I was after, I gave the flash and softbox combo to one of my traveling companions and asked her to hold it very close (sometimes only inches away) from my subject’s face. Although this was probably annoying to my subjects, by placing the light source close to their faces the reflection of the light from their skin became very soft and diffused. And by adding a slight warming gel to the flash, I was able to achieve nicer skin tones. Keeping the light this close also creates a prominent catch light in the eyes, which draws the viewer into the portrait. I didn’t want to compete with sunlight so I shot most of my photos in the shade. By incorporating colorful backgrounds, I was able to enhance the feeling of the Cuban experience.

_1030258

I set the strobe to work automatically with the camera through ETTL and varied my exposures using the camera’s convenient plus and minus strobe control. It took a couple of days of “Guerilla lighting” before I was able to develop a good sense of how to balance the flash and available light. In the majority of cases, I set the camera to underexpose the available light by half to a full stop.

130404_TRA_070_original

Tourists riding antique cars through Havana, Cuba.

The Lumix GH3 and the 12-35mm lens make a good, compact package that does not draw attention, which is one of the reasons I like working with it. When I added the soft box to the small Lumix strobe, I had a terrific, portable lighting system that enabled me to achieve the portraits.You can see these portraits and other images of Cuba at http://stock.irablock.com/-/galleries/faces-of-cuba.

Working with the new Panasonic GH3


This summer Panasonic asked me to test their new mirrorless, micro four thirds camera, the GH3. I took this opportunity to shoot in southern Utah, one of my favorite places. You can follow my adventures with this great camera. I am told it will be available in December.

Putting the New Lumix GH3 to the Test

I’m at Photokina in Cologne, Germany where today, Panasonic rolled out its Lumix GH3 camera. In late spring the folks at Panasonic asked me to test this new professional grade camera. I immediately suggested shooting in southern Utah. Although my choice was a bit self serving because I love the American west, I knew that Utah with its canyons, mountains and unique culture was the perfect place for photography.

Panasonic worked around the clock to get the prototype ready and it arrived at my studio the day before I was scheduled to leave for Utah. I was pleasantly surprised to find two new zoom lenses, a 12-35mm and 35-100mm, both with a fixed f/2.8 aperture. These two new lenses were solidly built in addition to being small. Luckily I own a GH2 and was familiar with many of the new camera’s functions and most of the seven lenses that came with it. I was able to fit the camera body, all of the lenses including the compact 100-300mm zoom, a flash, food, first aid kit and lots of water into my medium Tenba backpack. The GH3 and I were ready to go and the five hour flight would give me a chance to study the instruction manual.

This camera is also designed with a lot of dials and buttons which make it easy to change settings – when I’m working fast I don’t like scrolling through menus. The viewfinder is very bright and doesn’t have the ‘electronic’ look that earlier Electronic Viewfinders had. And the swivel screen monitor on the back made it easy for me to shoot low and high angle photos, like the image below of the bronc coming out of the chute.

During the ten days I was shooting in Utah I took the GH3 hiking and camping, climbing bluffs and exploring canyons, and exposing it to water and temperatures as high as 112 degrees Fahrenheit. And as I only had one body and needed to change lenses frequently, the camera was also exposed to a lot of dust and sand. This rugged camera had no problems functioning in these extreme conditions. Shooting the spectacular landscapes was inspiring but it was important to test the camera in non-static situations as well. I knew a Native American Pow Wow and a Rodeo would offer numerous action activities.

The GH3 didn’t let me down. Its great autofocus system was responsive and fast and the six fps motor was invaluable in capturing the bull and bronc riders. The dynamic range of the sensor was beyond what I expected and produced images with detail in both the highlights and shadows. Of course everyone wants to know if a four thirds sensor can deliver enough quality to make really large prints. Here at Photokina some of my prints are almost four feet long. When I was photographing the action at the Pow Wow and rodeo I was working with ISOs of up to 800 and saw a negligible loss of image quality.

Camping out under Utah’s night sky afforded another unique photo opportunity. I had never seen so many stars. To capture these ‘extraterrestrial’ like images I set the camera’s ISO to 2500 and used an exposure of thirty seconds at f/2.8 with the 12-35mm zoom. While the shutter was open my assistant and I used small flashlights to illuminate the surrounding landscape. Although I expected some noise under these extreme exposure conditions the resulting images were remarkable.

From canyons to cowboys, Native American dancers to skies saturated with stars, the images I shot with the prototype GH3 were beyond my expectations. I can’t wait to shoot my next journey with the production model.

7-14mm at 7mm, f5, 1/500sec, ISO200

12-35mm at 26mm, f8, 1/25sec, ISO200

45mm macro, f4.5, 1/160sec, ISO320

12-35mm at 35mm, f5, 1/2000sec, ISO250

35-100mm at 100mm, f8, 1/200sec, ISO160

7-14mm at 8mm, f11, 1/5sec, ISO200

7-14mm at 10mm, f4, 1/1600sec, ISO400

35-100mm at 41mm, f2.8, 1/1000sec, ISO640

7-14mm at 12mm, f2.8, 30sec, ISO2500

You can click here to see a full gallery of my photos.

Missed Flights are Nothing Compared to What Else Can Happen at the Airport


Preparing for an assignment is always stressful. Research, logistics, contacts, equipment, gear and the proper clothing are just some of the areas I need to get under control. Finally arriving at the airport was always a time for me to relax and regroup before beginning to work. But lately, airport security and delays, coupled with jet lag have created a new kind of stress.

Recently, my friend Mike Yamashita called me from his hotel room in Mexico. He was frantic because his Mac computer, the one he needed for the lecture he was going to give, had been picked up by someone else going through security. Mike had retrieved a Mac identical to his own, as had another passenger.
Luckily, the person with Mike’s computer made contact and both computers were able to be exchanged within a few days.

Another colleague, while going through security in Doha, Qatar in the middle of the night, was so exhausted that he simply forgot to retrieve his computer. He didn’t realize it was missing until he arrived at Dulles International Airport. Again, he was lucky in that security in Doha was able to find his computer and send it to him.

Of course, I thought these were random incidents. There was no way that I would ever forget or lose any equipment, especially in an airport. But jet lag, airport confusion, and distractions can happen to anyone, even me.

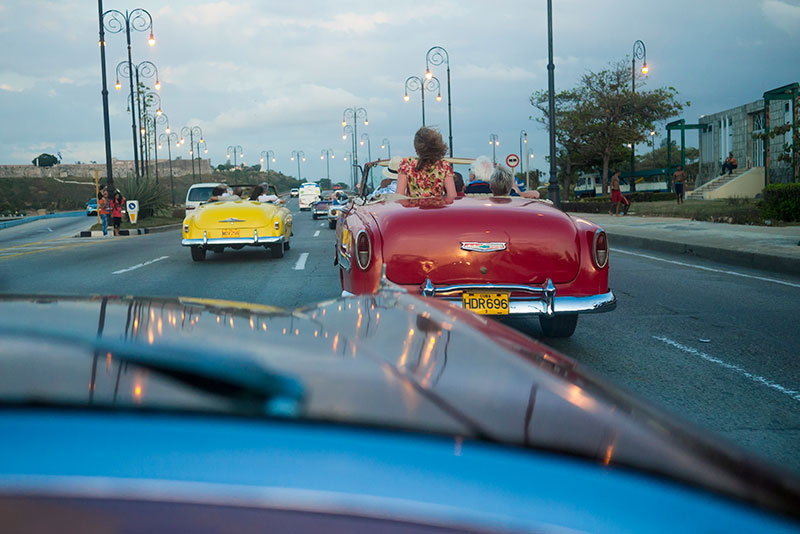
I was hit hard with the potentially disastrous consequences of airport stress when I arrived in the Kathmandu airport, after traveling for over 30 hours. I was shooting a last minute assignment for the National Geographic magazine on Lumbini, Nepal, the birth place of The Buddha. The baggage area was total chaos; three planes had arrived at this small airport around the same time. I had changed planes in Doha, Qatar and of course I was concerned whether my baggage would arrive with me in Kathmandu. I was tired, jetlagged and generally out of it, but was ecstatic to see my bags of lights, stands and cold weather gear on the conveyer belt. A colleague from the National Geographic was traveling with me. A local customs fixer from Kathmandu met us with the proper paperwork to get all of my equipment though Nepalese customs. I was carrying a bottle of duty free liquor in a plastic bag, a gift for one of the people I was going to be working with and I was concerned that in all of the confusion it might break. My shoulder bag held my laptop, books, a small camera and lens and reams of paperwork.

We slid through customs and headed out to the parking area which was even more chaotic than baggage claim and customs. My local helper and his assistants quickly loaded our bags into the back of the van and my colleague and I took a seat inside. As we proceeded through heavy traffic to our hotel, I was relieved to finally leave the airport. But my relief was short lived. When we got to the hotel, I stood at the back of the van and supervised the off loading of the equipment and luggage. Everything was there – except my Tenba rolling bag of cameras. It wasn’t in the van and it wasn’t with the hotel bellman. My first thought was that it must have been left at the airport. The last time I remembered seeing it was when I took it out of the overhead on the plane and wheeled it to the baggage area. I assumed one of my helpers had loaded it onto one of the carts and put it in the van with the other luggage.

Panic overtook my jetlag as we headed back to the airport, fighting our way through the traffic, knowing that every minute would be another opportunity for someone to walk off with the bag. I hoped that it was still in the baggage area, but if someone did take it they would be caught going through customs. As we raced through the back streets of Kathmandu, I asked the customs’ fixer to call someone, anyone at the airport to try to find my bag. I was in total shock as I came to grips with my stupidity in losing control of my cameras. Ten minutes from the airport one of the locals’ cell phones rang in the van and another Nepalese conversation ensued. When the call ended, my fixer looked at me and said the bag had been found. My next concern was whether someone might have grabbed something out of the bag, or that the black rolling bag that was found might not have been mine. Since I carried it on the plane, I had neglected to tag it with my identification.

When we arrived at the airport we were faced with another challenge – going backwards through customs into the secure bag area. We were denied permission. But my fixer called his friend inside customs who eventually came out and brought me into the luggage area. He took me to a small counter on the side of the baggage area where there were approximately fifty unclaimed bags. There, chained with a padlock was my Tenba. I showed the counter attendant my passport and boarding pass but since my name wasn’t on the outside of the bag there was nothing to connect me to it. The attendant asked me what was inside: “a lot of cameras and lenses, I hope”. We unzipped the bag and everything was there.

What would I have lost if the bag hadn’t been found?
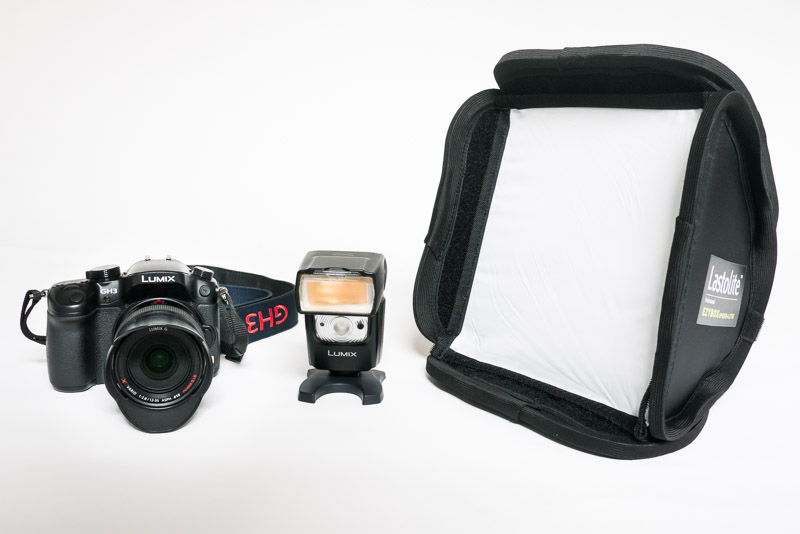
2 Canon 5D Mark IIs
8 various Canon lenses
1 Canon Strobe
2 500 gb back up drives and cables
2 Battery charges
Many CF and SD cards
My sanity

I have no one to blame for this but myself. I have tried to make excuses in my head: jetlag, worrying about breaking the bottle of liquor and my local assistants taking charge of the luggage. But at the end of the day, it is my responsibility to ensure that I have all of my equipment to do the photos and to complete the assignment. This means making sure that everything I put through security, I retrieve. It means that every piece of luggage and equipment that I check is taken off the conveyor belt. The stress of preparation is for naught if you don’t have the gear to do the job. My colleagues and I were very lucky. These incidents could have ended differently.

Finally!!! A Replacement for 5D Mark II

All photos were shot handheld at ISO 3200 with Canon 5D Mark III. The only adjustments done in Photoshop were to exposure and contrast; sharpening and noise reduction were not applied.

Fred Blake, right and Matt Karas at Fotocare gallery opening.

35mm Lens, ISO 3200, f3.5, 1/30sec,

Mime at Times Square, NY.

100mm Lens, ISO3200, f2.0, 1/750sec

Times Square, NY.

16-35mm Lens at 16mm, ISO3200, f5.6, 1/125sec

For the last three years I have been shooting with the Canon 5D Mark II. I have tolerated its inconsistent auto focus system, which was never upgraded from the original 5D and its slow frames per second shooting speed. But that was then; this is now. Last week I picked up my 5D Mark III at Fotocare in New York and I am pleased to report that this is a great camera.

The auto focus system is responsive and locks onto the subject. Although it has 61 points, I use the center point 95% of the time; I don’t trust any camera to pick the focus point for me. The Mark III shoots at approximately six frames per second, not as fast as the upcoming 1Dx, but fast enough for me since I don’t regularly photograph wildlife or action sports.

The image quality on the Mark II was fine up to ISO 1600, an improvement over the original 5D. But as newer equpment came out, the Mark II quality fell behind other cameras like Nikon. The Mark III, however has moved ahead. In my tests at ISO 3200, the files resemble the Mark II at ISO 800. This is a two-stop increase in performance. The noise quality is comparable to Nikon’s, which I felt looked more like traditional film grain, rather than electronic noise. I can’t report what the new camera looks like at ISO 10,000 or even 20,000 because as a working photographer testing equipment in real world situations, ISO 3200 is the number where I would max out. Perhaps someday I will need to go higher but for now, I am extremely pleased working with the Mark III at ISO 3200. I think back to the film days when pushing Fuji Provia to ISO 400 was extreme and now we are talking about ISOs of 10,000!!

Because the MARK III is configured like the Mark II, it’s very easy to use. Although the positions of the magnification and info buttons differ, this is a minor inconvenience. The other changes are minimal: the placement of other buttons are similar to the location on the 7D, the menu has eliminated the ”custom function” option although you can find these functions through the various camera and tool menus, the screen is a little larger and the camera now takes both CF and SD cards, to which you can shoot either or both. When using both, the camera offers many options for recording on each card. And according to Canon, the Mark III is better weather proofed than the 5D Mark II, though not sealed as well as the 1D series or the new 1Dx cameras.

The Mark III is now my professional, shooting camera. Although I will keep a Mark II for back-up, I am excited to be working with this up-graded version of equipment. The pictures above illustrate why.

Photographing Fireworks

A fireworks exhibition in Las Vegas

Fireworks’ displays are the highlight of many celebrations in the United States. Cities feature these amazing light shows on New Year’s Eve, centennial events, and most notably, the 4th of July. Their various patterns and colors against the night background can produce stunning visual photographs – images that you can capture by following these easy steps:

Use a tripod and shutter release to keep the camera steady.
Set the ISO at 100-400 and the exposure on manual. (F/8 -11 is a good starting point at ISO 100).
Turn off the auto focus to prevent your lens from searching for a focus point in the black sky, and manually focus at infinity.
Turn off the lens stabilization; it doesn’t work well on a tripod.
Don’t use a wide lens or the bursts will appear very small in your frame.
Watch your framing, the fireworks usually explode higher than you think. It’s also nice to include buildings or vistas in the shot for scale and depth.

And now the big secret: lock your shutter open and hold a black card in front of your lens. When you see a good burst of color, remove the black card for a couple of seconds, then hold the black card over your lens again. Remove the card when you see another burst. Repeat this process of removing the card and releasing the shutter until you feel you have gotten a good set of bursts on that one frame. Usually three to five bursts per frame are enough.

Since fireworks are set off in very quick bursts, your shutter only needs to be open from 20-60 seconds to capture them. You can avoid delays in shooting your next frame by turning off the camera’s long exposure noise reduction. (See my previous blog on night photography to learn more about noise reduction) It is important to shoot as much as you can at the beginning of the fireworks’ display. As the show goes on, smoke builds up from the explosions, which gives the sky a hazy look.

Enjoy the spectacle and have a safe celebration.

Working at Night

Panasonic GH2 7-14mm lens at 9mm. ISO 160, 6 seconds f/10

The "Hole"

When the sun goes down don’t put your cameras away, instead grab your tripod and enter a new world of imagery. I’ve been doing ‘night’ shots for many years and the key to making great night photos is simple – don’t wait until it’s totally dark, unless you are planning on photographing stars. If you are shooting landscapes or city scapes, a black sky will not work. Immediately after sunset, a diligent photographer can take advantage of the ten minute window when the sky has a warm glow and there’s still enough light to help illuminate your landscape. You can find color in the sky after sunset; the secret is knowing where to look.
The eastern sky turns cobalt blue while the western sky, where the sun sets will acquire nice pink and blue tones. Of course much of the color is dependent upon atmospheric factors: cloud cover, smog, dust, water particles in the air and the time of year.

When shooting a cityscape with buildings, the lights in the windows add even more depth to your final photo. The best time of year for these shots is in the winter when the sun sets before five or six o’clock and everyone is still at work. In the summer, city scapes can be problematic because the sun sets between seven to ten pm (depending on how far north you are),and because most workers are out of their buildings, the office lights are turned off.

It is best to use a tripod when shooting at night, even though you can set your digital camera to ISO 6400 and hand hold it with a fast lens. With a tripod you can stay at a low ISO and get a good quality file. The higher ISO will give you a lot of noise and that noise will be accentuated in the shadow areas in your image.

Here are some quick tips for night shooting:
• Use a sturdy tripod; a small tripod extended to the max is not stable.
• Use a cable release so the camera doesn’t move when you press the shutter. If you don’t have a cable release, trip the shutter using the self timer.
• Use a low ISO.
• Pick the sharpest lens aperture; it’s usually two to three stops down from wide open.
• Be careful that your camera meter does not take its reading directly off of a highlight or shadow.
• Although you will usually be set at infinity, be aware of where the camera is focusing.
• If the meter reading and the focus are a problem, take the camera off automatic. Use manual focus and manual exposure.
• Lock up your camera’s mirror. The motion of the mirror going up and down can cause camera shake.
• Finally, turn on the camera’s long exposure noise reduction.
There is debate among photographers as to how efficient this is. Some like to use the noise control in Photoshop. My opinion is that the camera does a better job. The downside is that after you take your photo, the camera does another ‘dark frame’ for the same amount of time as your original exposure, which results in a delay before you can take the next picture. The delay is caused by signal to noise ratios and the size of sensor sites; much too technical for the purposes of this blog. (If you want to learn more about it you can do a search.)

Technical aspects aside, shooting at night requires common sense. Get to the location early so you can scout it out and find a good position. Bring a flashlight; by the time you are done it’s going to be dark. Even better than a flashlight, wear a head lantern which frees up your hands. I recall an assignment in Utah when I went out on my own to do a night landscape. The area was quite remote and I had to carry all of my equipment down a steep and slippery path in the dark. There was no cell phone service and had I tripped or fallen and injured myself, I would have been in a lot of trouble. The lesson: don’t go out alone.

For this photo of ground zero in New York City looking west, I got to my location very early. I was shooting from a building under construction and I had to wear boots, a hardhat and an orange vest. I also had an escort with me from the building developer. Our first obstacle was that the construction elevator wasn’t running because it was the end of the day for the construction workers. We had to walk up ten flights of steps with my equipment to get to the right position. The second and almost deal killing obstacle was that in New York as in most cities, safety regulations require that buildings under construction be wrapped in netting to prevent construction material from flying below. This netting was so fine that I couldn’t place my lens through it. I thought my photo was not going to happen until I noticed that various sections of the netting were fastened together with locking cable ties. When I asked my escort if I could cut open a few of these ties, he was skeptical. Finally, he granted me permission on the condition that I close the netting with cable ties when I finished shooting. If I was going to take this picture, I needed to find cable ties; an item that I have plenty of in my studio but none in my camera bag, here on the tenth floor. Having come this far and high up, I couldn’t let the opportunity pass. I canvassed the construction bins around the various floors of the site, like a homeless person sifting through garbage cans. Ultimately I got lucky and found a box of cable ties. The photo was going to happen.

The sun went down that evening around 8:22PM. But since I was shooting west into the sunset, balancing the bright sky with the unlit, memorial fountain and barely lit trees wasn’t possible. The sky was darker by 8:40PM but the exposure for the dark shadows in the trees was going to render the sky too bright. Although it would have been easier looking into the darker, eastern sky that angle and direction wouldn’t give me the composition I was going for. It wasn’t until 9:00PM that the light came together and I was able to start taking the pictures I wanted. Working in the dark can be an enlightening experience.

Alaska through the lens of Panasonic’s Compact System Cameras

This slideshow requires JavaScript.

I have been editing and processing the photos I shot two weeks ago on my ‘workshop/cruise’ through Southeast Alaska’s Inside Passage. On that trip I took no Canon equipment; I only had the Lumix cameras that were loaned to me by Panasonic. Although I was impressed by their autofocus and the lack of shutter delay, it took me awhile to get used to viewing through the Electronic Viewfinder because the highlights appear to look blown out. I also needed to adjust to the ergonomics of the Panasonic bodies which differ from Canons. Eventually however the cameras started to feel good in my hands and I was able to have fun shooting photos from the ship and in the bouncing, Zodiac boats.

I had three Panasonic cameras with me: the GF2 which I reviewed a couple of weeks ago, the GH2 and a prototype of the recently announced G3. One thing is certain – these cameras and their lenses are all very small, light and compact. I use the GF2 as a walk around camera with the 20mm f1.7 pancake lens. Many of the images I shot on this trip were with the longer zoom lenses, the 14-140, 45-200 and 100-300. Since the sensor on these cameras is half the size of a ‘full sized’ sensor, the focal lengths of the lenses can effectively be doubled. Consequently, I’m working with varied length optics that are much smaller than what I’m used to carrying. The downside is that the lenses are a bit slow, usually varying between f4-5.6, but still usable by boosting the ISO and keeping the stabilizers on.

The experience of working with any new cameras, whether going large to medium format ( as I did a couple of months ago) or going small with the Panasonics is like being a kid with new toys!. It’s exhilarating. Although the G3 is slightly larger than my “GF2 walk around camera” it acts like a grownup camera. It has the same sensor as the GH2 and is just as responsive and as fast. Panasonic addressed some of the issues I’ve had with the GH2 in the G3, specifically the inability to turn off the focus point on the LED screen so that it cannot change position if you accidentally touch it. The battery life in the G3 is much improved over the battery life in the GH2, even though it’s using the smaller battery found in the GF2.

The quality of the raw files from the GH2 and the GF2 cameras was beyond what I expected. I processed the files using Lightroom and used its fabulous noise reduction when I was working at above ISO 800. The raw files were running slightly red which was easily fixed. Unfortunately I can’t address the G3 raw files at this time. The camera is so new that neither my Adobe nor Capture 1 products will process them. I did get a disk with a new version of Panasonic’s raw processor but it currently only works on a windows platform, which is not in my Mac workflow. I shot full size JPEGS+ Raw on the G3 with the intention of processing the raw files in the immediate future. However the G3 jpegs looked very good, once I added some sharpening and clarity to them. As this was a prototype and I rarely shoot jpegs, I was at the whim of the camera’s processing algorithm.

Many of the photo enthusiasts on the ship were working with much larger Nikons and Canons and were intrigued by my new set of equipment and my initial fumbling through various buttons. They wanted to play with my “new toys”. By the second day I was handling the equipment like a pro.